Measuring for a straight window may seem simple, but accuracy is key to achieving the right look and function. The right measurements ensure your rod is properly sized, your curtains hang neatly, and the window feels balanced in the room. In this post, we’ll cover the essential steps for measuring a straight window – the most common window – along with tips to avoid common errors so you can create a clean, polished finish every time.
You can also use the video below to more easily walk through each step of the process.
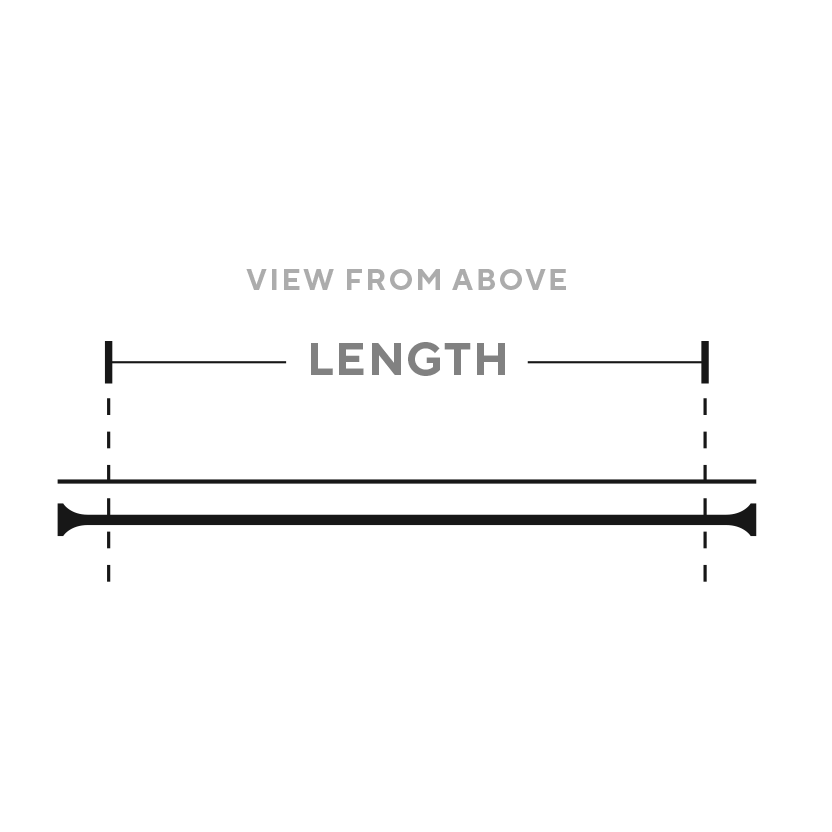
Measuring for Rod Length
Enter the desired length of the rod, finials NOT included. Be sure to measure in a straight, level line—keeping your tape measure parallel to the floor (for horizontal measurements) or parallel to the wall (for vertical measurements)—and always measure close to the wall surface.
Overhang
Be sure to consider your desired overhang on each side of the window. Overhang is the amount the rod extends past the trim (not including finials). It creates space to stack the drapes so they don’t block the window and also provides a more polished, professional look.
- 4–12" recommended per side
- Allows stacking drapes off the window
- Improves professional finish
- Inset brackets 2–4" from finials for balance
Keep in mind that in most cases you’ll want to place your end curtain brackets 2–4" in from the drapery finials. This positioning allows space for a few rings, grommets, or fabric panels outside the end brackets, ensuring the brackets remain hidden and the drapes hang naturally.
If using finials
Make sure there will be adequate room for both the rod and the finials in the mounting area.
Please Note: The measurement you provide for the length of your rod is the measurement of the rod only (NOT including finials.) The finials will extend out beyond this length. Ex: If you order a rod at 96", and finials which are 3" each, your total length with finials will be 96 + 3 + 3 = 102". This is true regardless of the type of rod or finial.
Rod + Finials = Total Length
If using socket brackets
If using socket brackets, make sure to subtract 7/8" from the length of the rod to allow room for the brackets. (The backplates are 3/8" thick each, so 7/8" gives room for two brackets plus 1/8" for wiggle room.) Err on making the rod too short, as leaving the rod too long will prevent installation or require you to cut the rod.
1. Measure the desired finished length of the rod (finials NOT included) — measure straight and level and record that value.
2. Calculate the bracket allowance:
- Backplate thickness = 3/8" each.
- Two backplates: 3/8" + 3/8" = 6/8" = 3/4".
- Add 1/8" wiggle room → 3/4" + 1/8" = 7/8". (So the total allowance for two brackets plus wiggle room = 7/8".)
3. Subtract 7/8" from your measured desired length to get the rod length to order/cut.
- Example (stepwise): If desired length = 60":
- Borrow 1" → 60" = 59 8/8"
- 8/8" − 7/8" = 1/8" → result = 59 1/8"
- So order/cut 59 1/8" rod.
4. Final check: re-measure the opening and ensure the calculated rod length fits the installation plan.
5. Tip: Err on the short side. A rod that is slightly too short is easier to install than one that’s too long (a too-long rod may not fit or will require cutting). Pair with heavy-duty curtain rings to ensure smooth movement and durability.
Clearance and French Returns
If you choose French returns for your straight rod, you'll need to specify the clearance — the space between the wall and the back of the rod. This ensures your curtains hang properly and don’t rub against the wall. If you choose French returns for your rod, please click here for more info.